Tuesday, May 30, 2017

War Between The States - Game Turns 93 to 96

The blood shed continues.

4/63 Cycle build for the Union

Same for the Confederates.
The number of troops is pretty close...

New leaders...

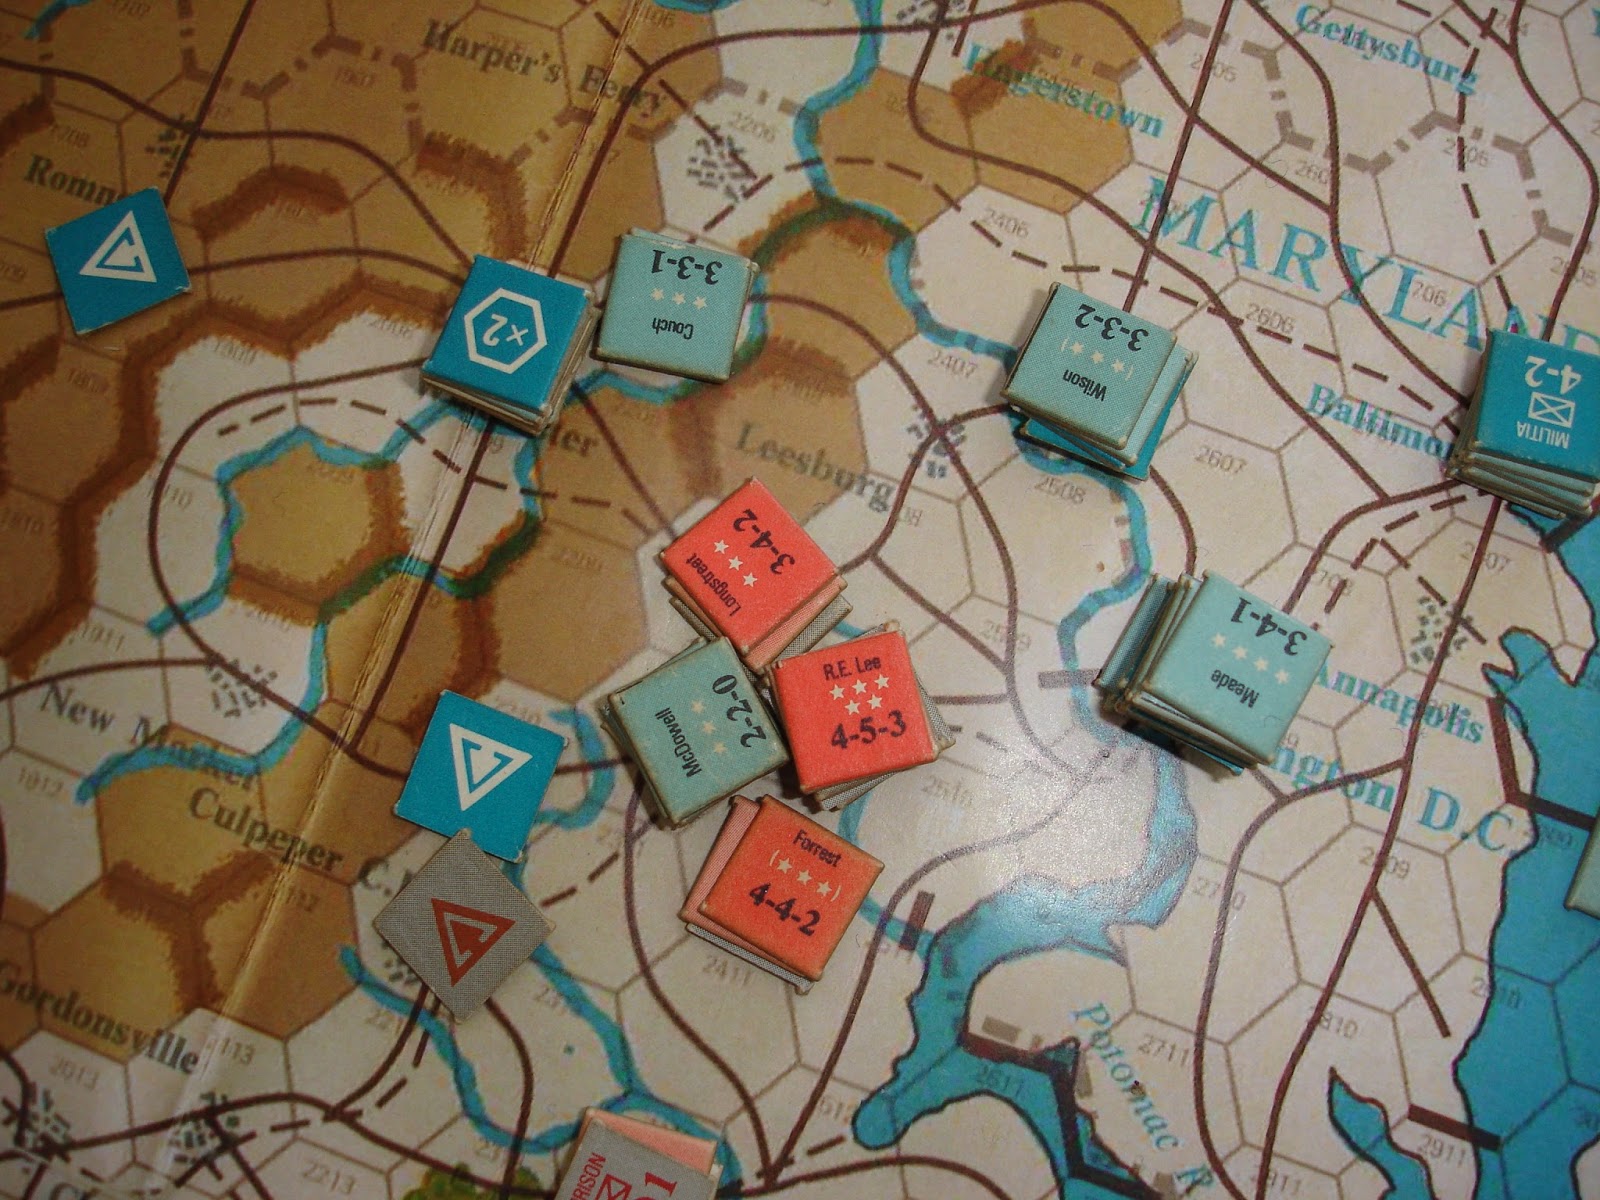
Lee continues rampaging around north Virginia.  
This time McDowell is roughly handled.

The initiative chits were 2, 2, 1, 1 for the Union.  The Confederates took the 3 chit each time, seeking certainty.  This poor pick of chits meant the Union had a hard time escaping from Lee's clutches.

The Eastern theatre.  
Meade has arrived to command the Army of the Potomac.

The eastern seaboard.

The gulf.  
The Union have just captured Pensacola after its Confederate garrison starved.

The Western theatre.
Nashville is has come under attack (finally), but the Rebs have not yet retreated in to its fortress.
Buell, with Lyons and Porter have just about captured Union City.

The Mountains.
Butler and McClellan are furiously writing their memoirs.

5/63 builds for the Union.

Rebel builds

Losses during 4/63 were 35 for the Union and 22 for the Confederates.  In part due to Lee's victory of McDowell, but also representing the losses incurred by the assaults on the rebel forts around Union City.

Friday, May 26, 2017

War between The States - Game Turns 89 to 92

March 1863 finds things in motion, eh, some things.

The Confederates implemented their first draft.  The Union followed.

I was slightly better prepared this time.

The Rebs slightly less so.

Rosencrans moves on New Bearn.

Lee strikes north!

The Rebs pullback from Union City 
which is now besieged by Buell and his Army of the Mississippi


Sedgewick proves to be a great disappointment.
Not one single attack is made against Nashville.

Lee inflicts 50% casualties on Crouch's corps at the Battle of Culpepper Court House.
The Union is devastated.

The Confederates evacuate new bearn.
Rosencrans chases McGruder,
but fails to catch him.

Initiative chits for 3/63 were 3, 4, 2, 3 for the Union and 5, 3, 3 and 2 for the Confederates.

Losses were 34 for the Union and 21 for the Confederates.

Bridge at Remagen - Blitzkrieg Commander

Richard had devised an assault scenario based on the Bridge at Remagen.  I took the US forces.

First up I need to drive over these Volkstum manning the barricade

Oh dear they have panzerfausts!

I brought up the Pershings and blasted my way through.

End of turn 2.  Progress is slow and there are only eight turns.
A command blunder didn't help.

Hitler Youth.
And yes, with panzerfausts.

End of Turn 3.

Some progress.

Command Blunder sets me back.
This was the end of Turn 5.

But the tanks are through.

We approach the bridge.

The infantry are still stalled in the town.

The Germans needed a double six to blow the bridge...

The view from the other side.

My eighth and final turn ended with another command blunder (rolling a double six).  That made three.  I did have one really good run of luck when I got the tanks through the town and shot up the bridge defenders, but then the bridge blew.  I was too slow getting up the infantry.

Great little scenario.

Addendum

I forgot to acknowledge the source of the US forces.  Thanks Mark Woods for leaving your troops with Richard.  They did you proud.  

All the other kit and terrain is form Richard's collection, including the Pershings.

Thursday, May 25, 2017

Normans and Vikings

Brendan suggested I use his Normans and he would use my Vikings.  Sounded good to me.  After reviewing the many scenarios available, we settled on the old favourite, Clash of Warlords.

The Viking levy hide in a wood

The Viking warlord has one band of warriors (12) backed by some hearthguard (4)

And the same again on the other side.

I put the peasants behind the swamp and sergeants with crossbows in the front,
ready to unleash a storm of arrows.

Then I send in one of my eight man units of mounted hearthguard.

They wipe out the Viking warriors,
 but are assailed and in turn destroyed by the other unit of Viking warriors.

Then the Viking warlord leads an attack on the sergeants.
They are also destroyed but the Viking warlord is left exposed.

My warlord sees his chance.

Charge!

One dead Viking warlord.  I think this was my first Saga victory.  Sadly yet another loss for my Vikings.

War Between The States - Game Turns 81 to 88

The Union get off to an excellent start in 1863 and occupy Kentucky.  Even the railroad declared for the North.

The Union's first initiative chit was a 5, the Confederates a 1.
The occupation of Kentucky was uncontested.

Union River Flotillas also wrested control back of the Mississippi. 

Butler prepared to leave the mountains, 
but Forrest made a surprise incursion.

But the real excitement was down in Wilmington.
Jackson had been trying hard to recapture the city.

As the Union started to use Kentucky to confront the rebels around Union City,
the rebs made a surprise attack.

In the nick of time, McPherson lifts the siege of Wilmington.

The 1/63 initiative chits for the Union were 5, 1, 2 and 2 and for the Confederates 1, 2, 5 and 1.

Builds are few now.

Should I be worried about all the reb cavalry?

Jackson is pursued, trapped and captured.

Lyons stabilizes the front
and takes the bloody battle to the rebs.
He suffers 40% casualties.

The Confederates now look to defending North Carolina.

They also pull back from the mountains.
Butler claims this as his victory,
although this is disputed by McClelland.

There is a growing Union presence in Bowling Green, Kentucky.
Hint: Nashville is a strategic target.

The 2/63 initiative chits for the Union were 3, 2, 1 and 5 and for the Confederates 1, 5, 3 and 2.